Monthly Talk
Doing lasik has been on my mind for a couple of years but I had been putting it off due to fear of the outcome. Since I have been less busy recently, I signed up for Shinagawa monthly talk posted on their facebook page (https://www.facebook.com/ShinLasikEyeCentre) on a whim. It was a no-brainer to choose Shinagawa as my sister and a couple of my friends had their lasik done there previously.
Mr Taro accompanied me to the talk at Shinagawa Optical located at Level 2 of Wheelock Place. I attended Dr Lee Sao Bing's talk which was around 40 minutes.
There used to be cash vouchers given by Shinagawa for the lasik treatments if you attend their talk some years back. During the talk I attend, Shinagawa offers an exclusive package rate of 3,688++ for their latest Intralase Wavefront using the latest Amaris laser. This rate is only valid for lasik procedure taken up within one month of the talk so if you are unable to make it, you can always attend the next monthly talk.

At the end of the talk, we were informed to follow one of the staff upstairs to Level 5 for make an appointment for the pre lasik assessment if we are keen. Mr Taro was like 'Let's go!' and I was like 'What!? I haven't make up my mind!' Anyhow, I followed Mr Taro and due to his quick action, we were in the front end of the queue and everyone was moving so quickly upstairs and I felt like a kiasu Singaporean on my way to some sale. I managed to get an earlier slot which is good as you can have more dates available for you to choose from for the lasik procedure subsequently.
After making the appointment, you can always head back to Level 2 should you have further queries for Dr Lee.
Pre Lasik Assessment
My appointment was at 9am and I was immediately led to two rooms by a nurse who performed various eye tests. She was professional and friendly and would explain each test that was performed. Numbing eye drops was also applied which stings slightly but was still manageable. I was then asked to watch 3 videos on the lasik procedures, eligibility and risks involved.
I headed back to the waiting area which was crowded with patients by then and waited around 15 minutes before I had my consultation with Dr Lee. The consultation was really short, around 5 minutes where Dr Lee summarized about the lasik procedure which was mentioned during the talk. Honestly, I did not do much homework about lasik and could only ask if my cornea was thick enough and it was only that Dr Lee assured me that there was no issues with my eyes and in fact, my cornea is thicker than the average. I could opt for the newer Amaris laser or older Allegretto laser depending on my preference. There was no hard selling on his side to push me into doing the more expensive option.
I was slightly disappointed though as the consultation seems really rushed and he did not really go into the details of my eye tests outcome. My sister assured me that probably there was no issue which is why he did not go into elaborate details.
I headed back to the waiting area where you would be asked to book for a surgery date so it would be good to be really decisive. I could not make up my mind on which laser to use but booked the surgery date first.
I waited awhile before 3 more eye tests was performed. The assessment took around 3 hours in total and I left before 12 noon.
The numbing eye drops would affect your vision slightly for 4-5 hours according to the nurse. My vision was not really affected though and I could move around as per usual. The only thing was that I was not able to read texts on my phone with my specs on.
Mr Taro and I went to One Man Coffee at Upper Thomson Road as I read pretty good reviews about it. We were there on a weekday lunch timing and managed to get a seat. The cafe is located just a few steps down Habitat Coffee (which was quite crowded).
The cafe has a all day brunch menu with limited offerings. I had the brioche french toast while Mr Taro had the bacon jam at my urging heh. We were disappointed at our selections. At $10 each, the serving was small and nothing to rave about in our opinion. The brioche french toast is reminiscent of bread pudding which I did not fancy as I find it rather soggy.
French Brioche Toast with Homemade Berry Compote, Candied Walnuts and Fresh Cream
Gashouse Eggs-Toad in the Hole-Eggs in the Bread with the Hole in the Middle Served with Smoky Bacon Jam
That being said, I enjoyed the cappuccino at $4.50 and would love to come back again for the coffee.
My Chinese Crackers Pork Chop dish mentioned in my previous entry was accompanied by polenta, poached egg and vegetables.
Polenta, poached egg and vegetables Recipe (Serves 2)
Vegetables Ingredients
- Vegetables of your choice. I had carrots and cauliflowers in my fridge so I used them. You can also use broccoli, zucchini, tomatoes etc.
- 0.5 tsp of coarse black pepper
- 0.5 tsp of Italian leaves herb/ basil leaves
- Dash of Ground thyme or Dried rosemary. I add parsley or coriander leaves as well.
- 1 tbsp of Extra virgin oil
- 1-2 shallot and/or garlic, depending on own preference
Instructions
1. Cut the carrots into slices and cauliflowers into small florets. Wash them with salt water.
2. Bring a pot of water to boil. Add a dash of salt to the boiling water and add the vegetables. Boil for 10-15 minutes.
3. Remove the boiled vegetables from the pot and place them in a bowl.
4. Heat up the oil in a saucepan and add the shallot and garlic to stir fry for 3-4 minutes.
5. Add the vegetables and stir fry for 2 minutes before adding the coarse black pepper, dried Italian leaves herb/dried basil leaves herb, ground thyme or dried rosemary.
6. Serve up the cooked vegetables in two serving bowls.
Polenta Instructions
1. I usually prepare 80gms of polenta for 2 servings. I'm using Bob's Red Mill Polenta.
2. Follow the instructions on the packaging. For mine, it states to add water thrice of the polenta portion.
3. Add 240g of fresh milk or chicken stock or water or a mixture of all first to the saucepan and bring it to a boil.
4. Add polenta and stir it constantly for 10-15 minutes. Top up with extra water when required.
5. Dish up and separate into the two serving bowls and mix with vegetables above.
Note: I use 120g DIY prepared chicken stock and 120g fresh milk. The solution gets absorbed pretty quickly and I add in plain water and additional stock and milk along the way. Usually I just keep a close eye on it to make sure it does not dry up. The result should be a creamy polenta. You can also opt to add in some Parmesan cheese for extra flavour. I have added ricotta cheese before and it tastes just as good.
Poached Eggs Instructions
1. Prepare 2 fresh eggs. Add the egg to a measuring jar with water. If it sinks to the bottom, it is fresh. If it bobs up slightly, it is about a week old. I use my eggs bought one week back and I still managed to do a successful poached egg.
2. Bring a small shallow pot of water around 5cm height to boil.
3. Add a teaspoon of salt and two tablespoons of distilled white vinegar.
4. Prepare a bowl. Crack one egg into a mesh strainer and excess egg white will drip onto the bowl below.
5. Add the egg in the mesh strainer into the barely simmering water.
6. Stir around the egg with the slotted spoon to maintain the shape of the egg.
7. Remove the poached egg with the slotted spoon after 1.5 minutes for a runny yolk.
I recently came across a Chinese pork chops recipe by noobcook.com (my favourite food recipe website) and decided to try it out. I have modified the recipe slightly as I'm not keen to purchase off-the-shelf breadcrumbs and lazy to prepare DIY breadcrumbs.
Crackers Pork Chop Receipe (Modified slightly from noobcook.com)
Ingredients
- 10 Pork loin cut to 0.5 -1 cm slices by the pork seller at my wet market
- 3 tsp light soy sauce
- 4 tsp oyster sauce
- Dash of black/white pepper
- 1 beaten egg
- 5 pieces of Jacobs cream crackers crushed in a bowl
- Oil for cooking
Instructions
1. Tenderize pork chops by pounding with the flat blade of the knife. I use a pounding tool given by my mil as shown below. This is the most important step to achieve tender and springy pork chops! I pound diligently for both sides of the pork chops.
2. Marinade pork chops in soy sauce, oyster sauce and pepper for a few hours or overnight in the fridge. I personally add a dash of Worcestershire sauce and mirin.
3. If kept overnight, defrost the pork chops a few hours before cooking. When ready to cook, coat the marinated pork chops evenly in the beaten egg.
4. Coat each pork chop (both sides) in the bowl of crushed cream crackers.
5. Heat a wok with 1 tbsp oil. Shallow fry pork slices, in batches, until golden on both sides, adding more oil to the pan whenever needed.
6. Place the pork chops in paper towels to drain excess oil before serving. Enjoy!
Mr Taro gave thumbs up for this recipe and declare it as his favourite dish for now. I served it with polenta chips with poached egg and cauliflower and carrots. Will share the recipe soon!
Mr Taro and I recently adopted a cat, it has been two months so far and I have grown to love the cat so much (: It took us months of deliberation and I researched so much on taking care of a cat to convince myself that I am ready and suited for the 15-20 year old commitment; sorta like a research project ;p.
To be honest, I'm not a big fan of cats and am terribly afraid of getting scratched. But Mr Taro's love for cats is evident and we decided to give it a go. We started off with visiting SPCA and stalking catwelfare and other groups for abandoned/stray cats. I contacted a few fosterers and shortlisted a few for Mr Taro's consideration. In the end, it was Nicci that caught Mr Taro's eye and we went for a 5 weeks trial adoption for TWO sibling cats much to my apprehensiveness.
We decided for a permanent adoption for Nickel instead..mostly due to his personality which is more suited for our busy working life. It was a difficult decision especially for the Mr Taro but personally, I feel that two cats are too much for us to handle for now :(
Meet Nickel, the handsome cat.
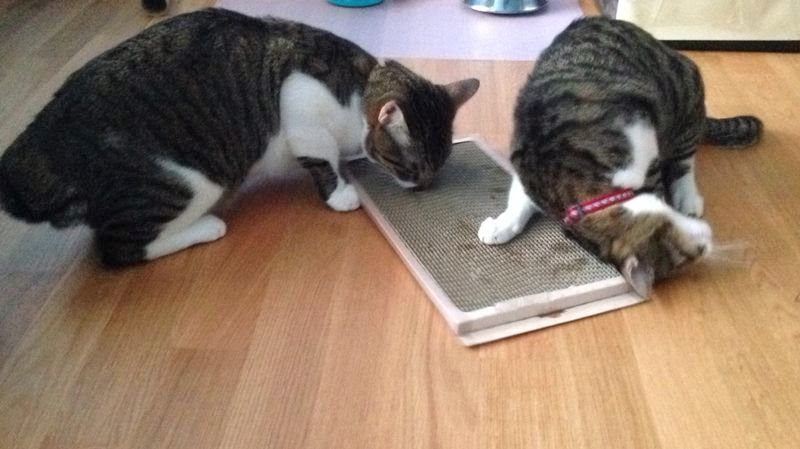
Photos of Nicci and Nickel during the trial adoption period
They were as frightened as me initially ;p
Enjoying the air con breeze lol.
They will sprint back to the room once there were movements outside.

.JPG)


.JPG)
.JPG)